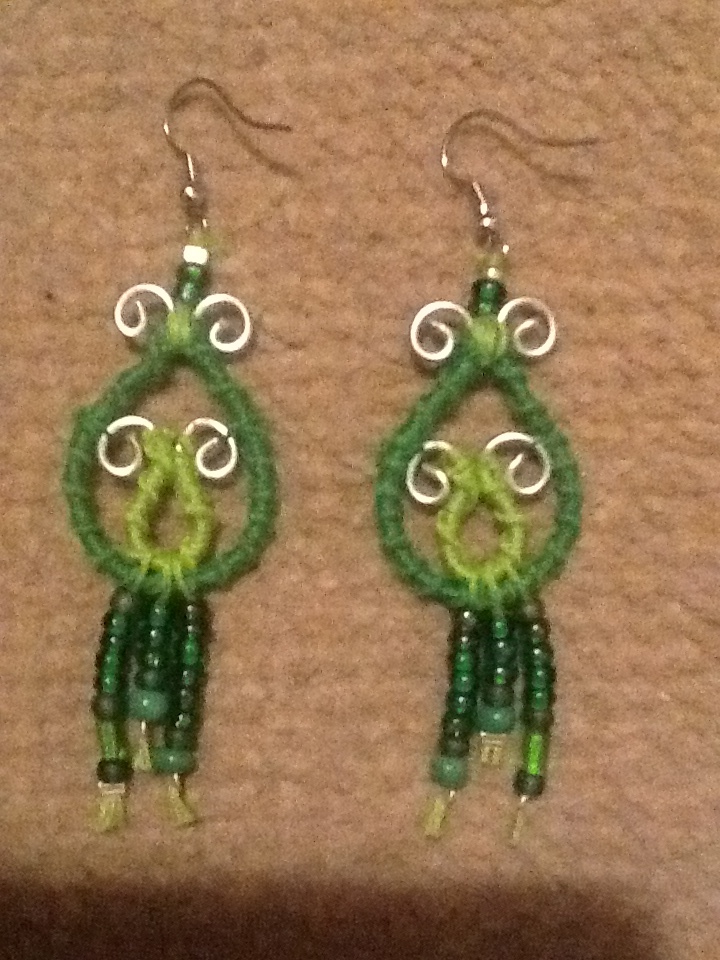
This is my very first pair! Woo hoo!
I’m so glad they turned out and as soon as I finished I was excited to put them in. They will work awesome for St Patricks Day. Ill still ware them like crazy though. I love green!
Supplies.
A few spare beads.
Flexible wire. —1$ at Walmart. Practice with the cheep stuff.
Colored floss.
Needle nose or round nose.
Wire snips.
A few crimp beads. (Optional.)
2 Earring tops
The Foundation.
1. Cut two long lengths of floss the same size. One for each earring.
2. Unroll some of your wire. Don’t cut yet.
3.Fold one string of floss in half and attach to wire with a Larks Head Knot. (Doesn’t matter which direction)
4.Continue with a Half Hitch Knot until you have used all the string. Leave enough and tie two regular tight knots to secure.
5.Snip wire, leaving a half inch or so on each side.
6.Repeat with second string of floss. When your done push floss together so its the same as the fist. Snip wire to match.
7.For the inside you will repeat the above steps but with a lesser amount of floss.
8.Now that you have four wires…take a needle nose or round nose and bend away.
(If you over do it with any wire it weakens the structure so bend as little as possible and use practice wire to begin with.)
9.Once you’ve figured out placement. Use your floss to anchor in place but peel the floss apart so you can use a thinner piece.
10.Use your thinner floss to string a few beads and knot the ends or use a crimp bead to finish it off.
